4 terms
Invalidation and Risk Terms
The mechanical rules for stop placement and wave count invalidation — the risk management backbone of every Elliott Wave trade.
5.1 Invalidation Level
A specific price level that negates the wave assumption if crossed.
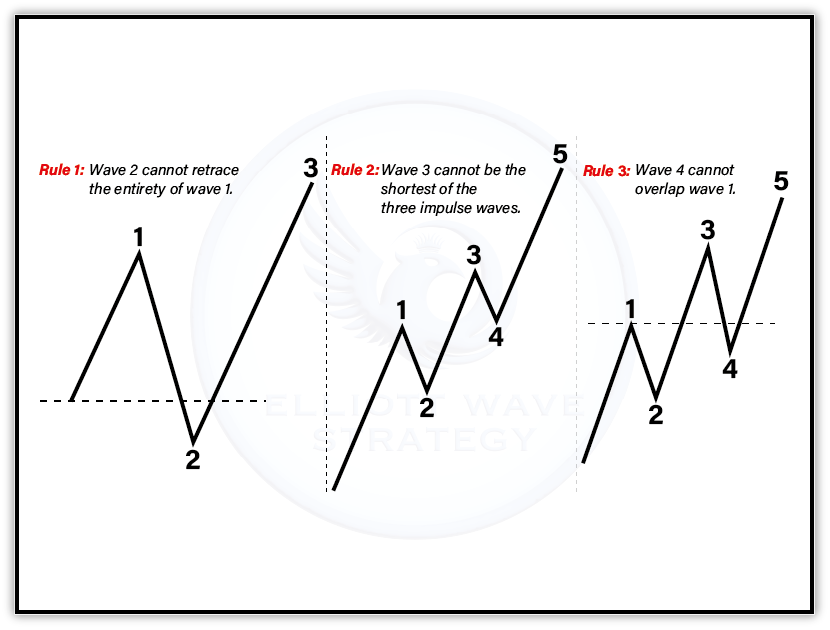
- ·For wave 2: the start of wave 1 (wave 2 cannot retrace 100% of wave 1).
- ·For wave 4: the peak of wave 1 (wave 4 cannot overlap wave 1 in a standard impulse).
- ·Once the invalidation level breaks, the count is wrong and the trade is exited — no discretion needed.
5.2 Wave 1 Origin
The absolute starting point of wave 1 in an impulse — the most critical invalidation reference.
- ·If price falls below the wave 1 origin during wave 2, the five-wave impulse count is invalidated.
- ·Often used as a hard stop for impulse wave trades.
5.3 Common Stop-Loss Strategies
Risk management approaches derived directly from Elliott Wave structure.
- ·Wave-2 entry stop: placed just below the origin of wave 1.
- ·Wave-4 entry stop: placed just below the end of wave 1 (wave 4 cannot enter wave 1’s territory).
- ·Diagonal trade stop: placed just beyond the throw-over extreme of the ending diagonal.
5.4 RSI Divergence as a Wave Signal
When price makes a new extreme but RSI fails to confirm — a common signal of wave 5 exhaustion or the end of a wave C.
- ·Bearish divergence at a wave 5 high warns of impending trend reversal.
- ·Bullish divergence at a wave C low suggests the correction is near completion.
- ·Not a standalone signal — must be combined with wave count confirmation.